Have you ever heard of gravity bongs? Have you ever tried any of its incredible powers to enhance the effects of your weed? Gravity bongs are like the homemade and improved version of the classic common water pipe, although with the advantage of being able to make your bong with a few materials that you will surely have at home.
Imagine this: water, plastic bottles, a small bud, and a little Physics. And boom! You have a great way to smoke your favorite herb smoothly and effortlessly, and also achieve a much more powerful effect than smoking it in any other way. In this article, we will teach you how to make your own gravity bong at home, so that you can impress your friends at your next tasting session. Read on and we’ll tell you all the secrets!
What is a gravity bong, and how is it used?
Surely, on some occasion, you have found yourself wanting to smoke a nice joint of your favorite weed, but damn it, you don’t have any paper! This situation has led the most restless stoners to invent dozens of the most unlikely ways to achieve their goal, and gravity bongs are probably one of them. Basically, it is a system for smoking weed with the help of a utensil that you probably have at home, a plastic bottle. Yes, it is probably not the most ” trendy ” and elitist in terms of smoking devices, but we assure you: it is quick, simple, and you will also have a hard time believing the powerful effect you will get with just a small flower.
But let’s take a quick look at what this junk is; As we tell you, a gravity bong is nothing more than an ingenious device for smoking marijuana, which you can make in a moment and with an investment of a few cents. Think of a soda bottle cut in half, with a bowl to hold the herb on top and a bottom chamber filled with water. And a little bud, of course. Well, that’s it, you don’t need anything else to have one of the most memorable smoking sessions of your life!
")
And this is where the magic of this system lies: when you light the herb and lift the bottle, the water moves downward due to gravity, creating a vacuum that fills the chamber (the bottle cut in half) with smoke. Then, you just remove the bowl, and while inhaling, you lower the bottle so that the water “pushes” the smoke upwards. Simple, right? But let’s start at the beginning; below, we will tell you how to make your gravity bong in two different ways, the classic and the cascade. Let’s do it!
How to make a gravity bong
Come on, let’s build this homemade bong! Here is the step-by-step plan to make your gravity bong with two plastic bottles and a few other materials that you probably have at home:
- Gather your materials: You’ll need two plastic bottles, a sharp knife or scissors, tape, a small bowl or bowl to put the herb in, and something to make holes in, like a hot screwdriver or awl.
- Prepare the bottles: Cut the bottom of one of the bottles and the top. This will be the part that contains the water, which will serve as the “base” of your bong. Then, make a hole in the cap of the other bottle large enough to fit the bowl or bowl you have or have prepared. Also, cut this second bottle in half so that you can insert it into the base, that is, half of the first bottle that you have cut and filled with water.
- Assemble the bong: Fill the cut bottle with water (the base of the bong) and insert the bowl into the cap hole of the second bottle. Fill the bowl with some ground herb from a grinder, but don’t close the cap completely yet. Place the bowl half of the bottle over the water and hold it so that only the neck of the bottle is out of the water.
- Let’s smoke! : With the bowl full of weed, close the cap firmly and light it with your lighter while slowly lifting the bottle with the bowl; You will see how the smoke gradually fills the bottle or chamber. When you have consumed all the weed and have the lower chamber full of smoke, you can now remove the bowl and take a good puff. Be careful, if everything has worked correctly, there will be a large amount of smoke in the bottle, enough for several puffs! If you want an even stronger experience, slowly lower the bottle with the bowl as you inhale, so that the water will “push” more of the smoke towards the neck of the bottle, which in this case acts as a mouthpiece.
")
And there you have it! Your homemade gravity bong is now ready. Regarding the bowl, if you don’t have anything else on hand, you can use aluminum foil, molding a bowl with it, and then pierce its base several times to let air (and smoke) pass through. Real fans of this type of bong usually use bowls for bongs or bubblers, even with a downstem.
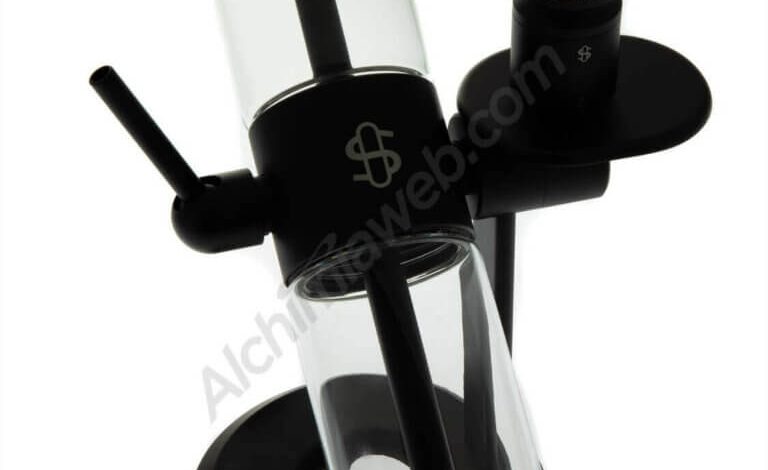
As a base for your bong, you can use a bottle slightly larger than the one you will use to attach the bowl, although if you only have one bottle, you can use any container to put water in, such as a kitchen saucepan or even a bucket. If you try it and fancy a more professional option, don’t hesitate to try the Stundenglass Gravity Hookah, you won’t regret it!
How to make a waterfall gravity bong
Below we present another method in which you will only need one bottle to make your gravity bong, although, as you will see, you will need a little more skill than in the previous case. Let’s see how to build a waterfall gravity bong:
- Materials: Basically, you only need a plastic bottle, a cutter or punch, and some aluminum foil in case you don’t have a bong bowl.
- Preparation of the bottle: As in the previous case, the first step will be to make the bowl. Make a large hole in the bottle cap where the aluminum foil cup will rest, and also make a few small holes in the bottom to facilitate airflow. Next, make a small hole in the bottom of the bottle (keep in mind that you should be able to cover it with a finger during the burning process of the herb.
- Assemble the bong: With the hole of the bottle covered with a finger, fill it with water until only a few centimeters remain. Cover the bottle with the stopper/bowl and prepare to light it. Before doing so, remove your finger from the hole in the bottle so that the water begins to escape (you can do this over a kitchen saucepan or bucket), and light the herb in the bowl. You will see that, as the water escapes, the bottle becomes full of smoke. As soon as all the water has escaped, close the hole again with your finger to avoid losing smoke.
- The test: If everything has gone well, you can now remove the cap from the bowl and take a good drag on the bottle. You will see that if you remove your finger from the hole while you inhale, the puff will be much more powerful…you are warned!
We hope that this article has left you wanting to try a gravity bong. The truth is that it is quite an experience and is ideal if you have little weed and want to make the most of its effect. Remember, creativity is the limit when it comes to smoking cannabis, so have fun exploring new ways to do it…Oh, and if you decide to build your gravity bong, let us know how it goes!