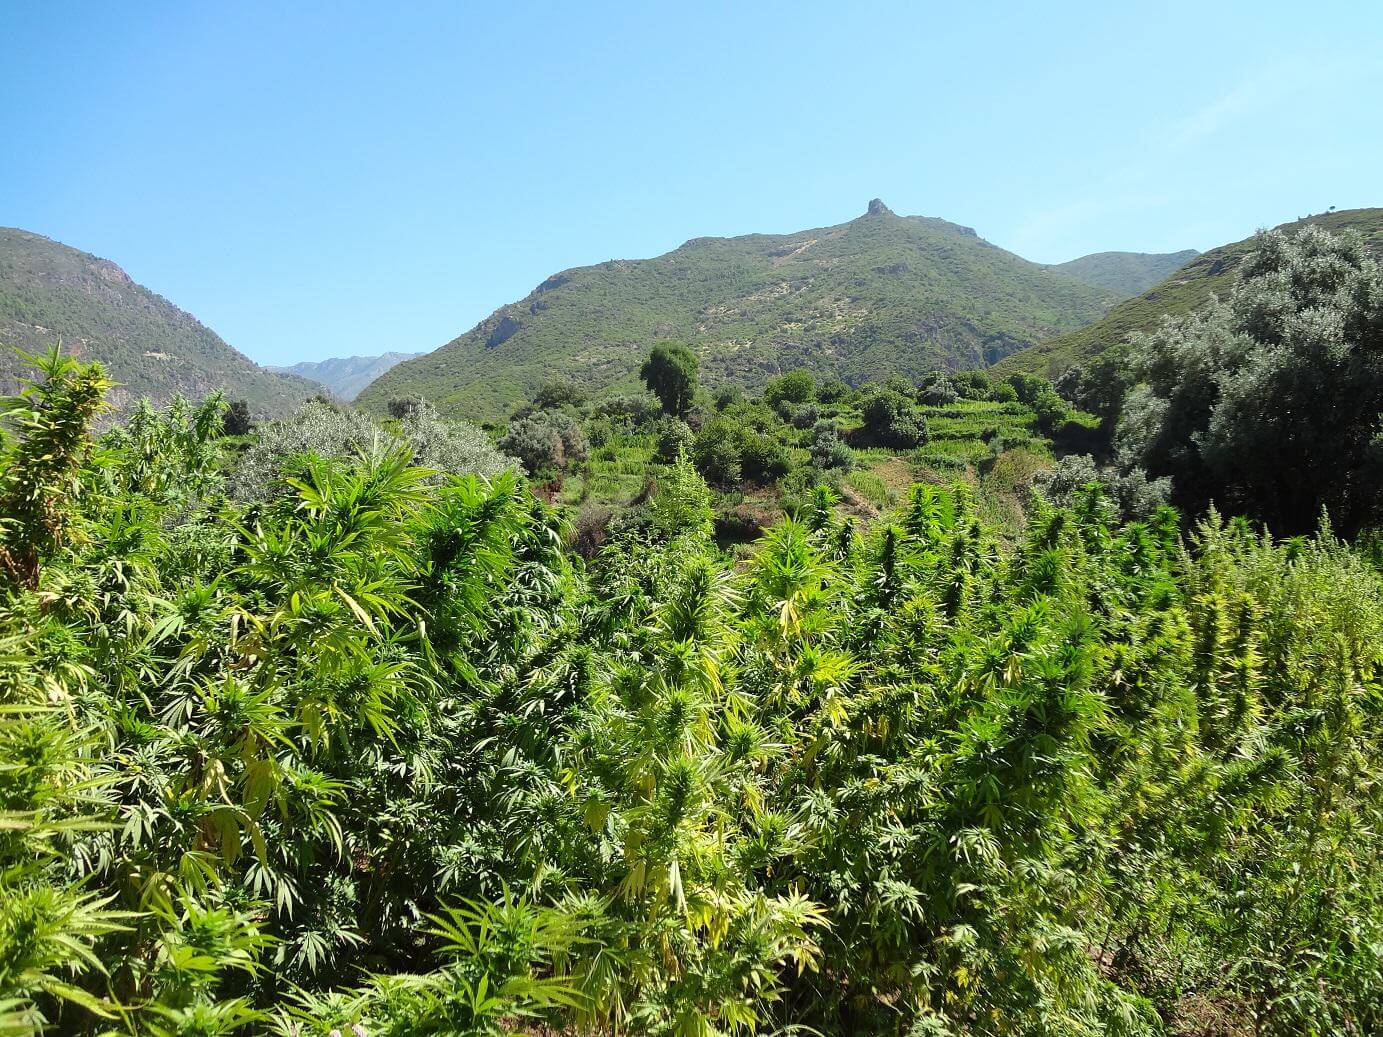
The outdoor marijuana cultivation is undoubtedly the most common approach in countries that enjoy a suitable climate for growing it.
Many consumers rely on a good outdoor grow to keep their stash full of buds throughout the year, becoming fully self-sufficient growers.
This post will focus on improving plant yields in outdoor cultivation. It can sometimes be tricky to get more out of your plants, but there are always tips and tricks that help us reach this goal: maximising outdoor production.
Outdoors, there are basically two growing methods: in pots or directly in the ground. Many of the tips and explanations we’ll share throughout this post apply to both types of cultivation. Let’s go step by step.
Before getting started with seed selection, we need to be clear about where we’re going to grow our plants and get to know the environment as well as possible, both in terms of climate and the type of substrate we’ll be working with.
The importance of climate and the growing environment
The climate of the location where you plan to grow is very important, as it determines the type of genetics you should use to make everything run much more smoothly. For example, if you live in a place where rainfall is frequent, you’ll want to choose cannabis strains that are resistant to high humidity levels.
If rainfall is only present at certain times of year — for example, at the onset of autumn — then you can choose genetics that can be harvested before the rains arrive. For these regions, certain varieties have been developed that finish a few weeks earlier than average, allowing growers, depending on where they are, to avoid the rainy season altogether and forget about the problems it brings, such as moulds like botrytis, pythium, powdery mildew, and so on.
At Alchimia we have designed a genetics selector that helps narrow down the search for the right plant to grow based on your preferences and growing conditions — though first, you need to be clear about what you’re looking for, and as we’ve just mentioned, climate is without doubt one of the most important factors.
Sun exposure and marijuana plants
Another very important aspect of outdoor cannabis cultivation is the sun exposure the plants will receive. The sun is the main driving force behind all plant and animal life — nothing thrives without it. By the same token, the more hours of direct usable sunlight your plants get, the healthier, better-structured, and more productive they will be — always comparing two identical genetics grown from clones.
If your outdoor growing space has different spots with varying sun exposure, always try to place your plants where they’ll receive the greatest number of sunlight hours.
Placing your plant in a sunnier spot also helps prevent excess humidity in autumn, greatly reducing the risk of mould developing on the plants. And if that growing spot also happens to be well-ventilated, it truly becomes an exceptional location for outdoor marijuana cultivation, capable of producing enormous yields.
With cannabis growing in pots, there’s no problem since plants can easily be moved to follow the sun. But if you’re planting directly in the ground, you need to be 100% sure you’ve found the best possible spot before committing.
When should you start growing outdoors?
This is certainly a very common question, and it can have different answers. In this case, since we’re aiming for the maximum yield from a seed-grown plant, the answer is simple: the sooner the better!
In Spain we have four well-defined seasons, and we use three of them for outdoor cannabis cultivation at maximum yield: spring, summer and autumn.
Seed germination outdoors takes place during spring, a period when plants grow more vigorously because daylight hours are increasing until the summer solstice, after which they begin to shorten. This vegetative period lasts for a few months, after which plants will start to flower in summer to be harvested during autumn. We’re talking here about photoperiod plants — that is, non-autoflowering plants, whether regular seeds or feminised.
We can therefore get ahead of the outdoor vegetative period by starting growth indoors, adapting the indoor photoperiod to match the number of daylight hours that will be available outdoors at the time the plants are moved outside. For more detailed information, check out our post on the ideal time to take your marijuana plants outdoors.
Daylight hours by country and hemisphere:
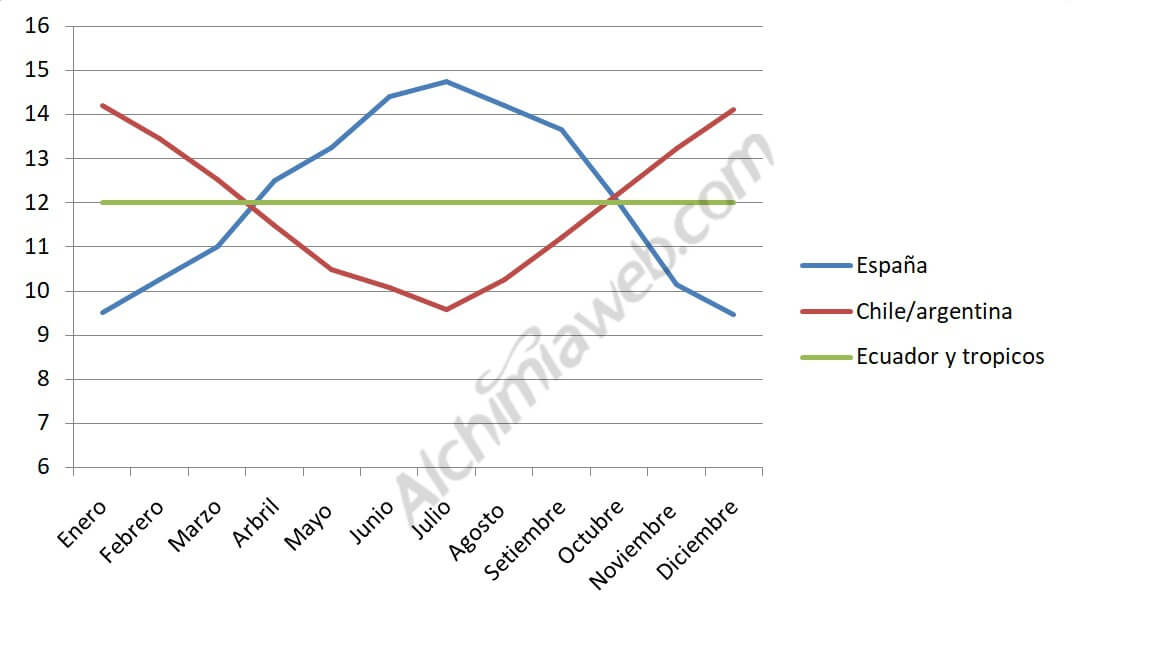
As we can see in the chart, the northern and southern hemispheres have inverted solar schedules — meaning that when it’s winter in Spain, it’s summer in Argentina or Chile, and vice versa. On the other hand, in the tropics and along the equator, daylight hours remain consistently around 12 hours per day throughout the year.
So growing in the northern or southern hemisphere is very different from growing in the tropics or along the equator. In the north and south, plants have months to develop during the vegetative stage, whereas near the equator or in the tropics this is not the case.
This is because daylight hours in the tropics and equatorial regions are always around 12 hours, which means cannabis plants begin to flower once they’ve reached maturity, but at a considerably smaller size compared to those grown in the southern and northern hemispheres, where plants can benefit from up to 16 hours of sunlight per day.
Substrate in marijuana cultivation
Another important factor to consider is the substrate you’ll be using. If the soil available to you isn’t suitable, many problems can arise during the grow that are very difficult to fix afterwards. This applies both indoors and outdoors, whether growing in the ground or in pots.
You should always check the composition of the soil in the area where you plan to grow. If the soil is very clay-heavy, waterproof, compacted, turns to mud when wet, or compresses the roots, it will only cause problems with the root system. If the substrate you have isn’t airy and well-draining, you’ll need to improve it yourself, because if the plant doesn’t have a good foundation, everything will go wrong.
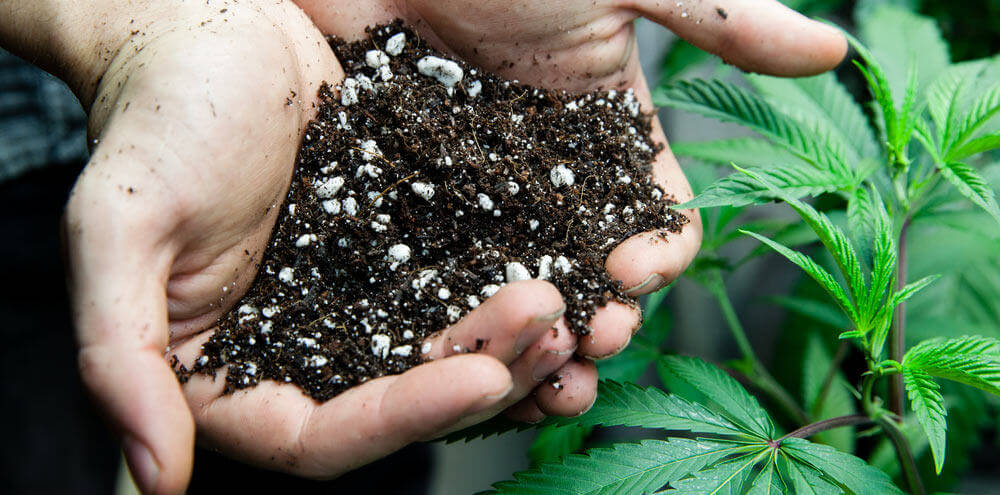
There are many different ways to put together a good growing mix. What really matters is that the soil you use for your plants is very light and airy — the more so the better — as roots will grow faster and so will the above-ground part of the plant.
A suitable substrate mix for marijuana cultivation:
- A blend of different peats (blonde, black and garden peat)
- Worm castings
- Coco coir
- Perlite
When mixing your soil, you can also choose to enrich it with slow-release fertilisers for marijuana and various additives, so the plant has everything it needs right from the start of its vegetative stage.
There are various brands specialising in slow-release nutrients that work very well and offer comprehensive, well-rounded formulas suitable for every stage of the plant’s life.
All of these fertilisers can be used without issue mixed directly into the soil, following the dosages recommended by the manufacturers.
Growing marijuana directly in the ground or in pots?
This is a question that is sometimes very easy to answer and other times not so much. What is clear is that if you don’t have access to a small garden or plot of land and only have a terrace or balcony, you have no choice but to grow in pots.
For maximum outdoor yield, we recommend growing directly in the ground, although using very large pots also makes it perfectly feasible to achieve impressive harvests.
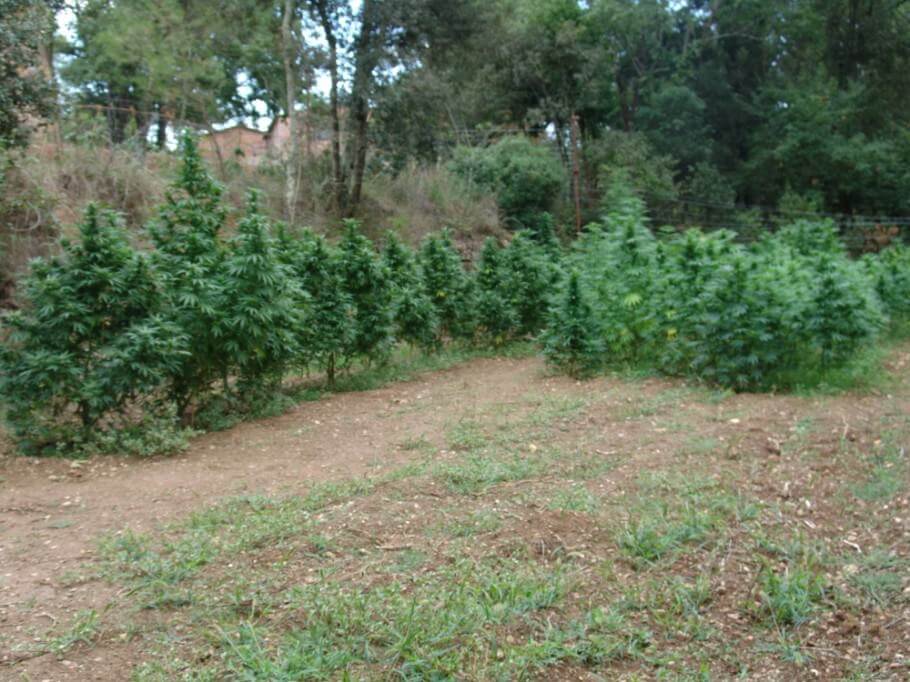
A plant’s yield, beyond the genetics and fertilisers used, will depend on its size and shape. A very tall plant with little branching won’t produce much, as its yield will be quite low compared to a plant that has been pruned at the right time. So it’s important to know when to prune a plant so that it can improve its structure when needed.
Cultivation for maximum outdoor yield
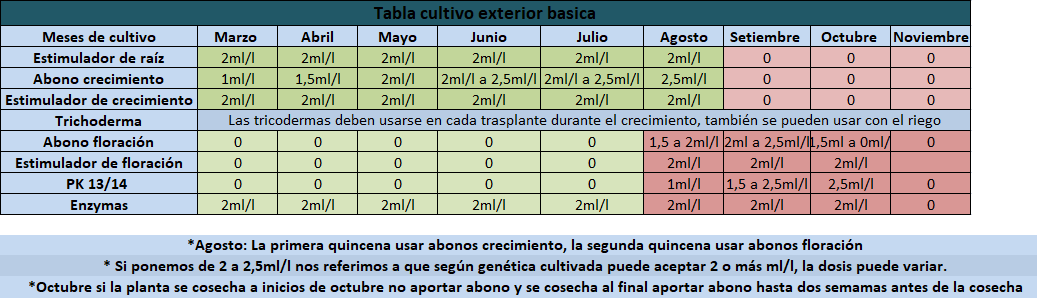
Right, now that we’ve covered the genetics to grow, the substrate, the best location, the fertilisers to use, and everything else discussed above, let’s look at how to carry out the grow month by month from the start of spring — when we’ll begin by germinating our seeds — through to the end of the season.
Start of the outdoor grow, Spain — March:
March is a somewhat special month, as it’s the transition between winter and spring. Depending on where in Spain you’re growing — north or south — conditions can vary considerably, since the south generally enjoys milder temperatures than the north.
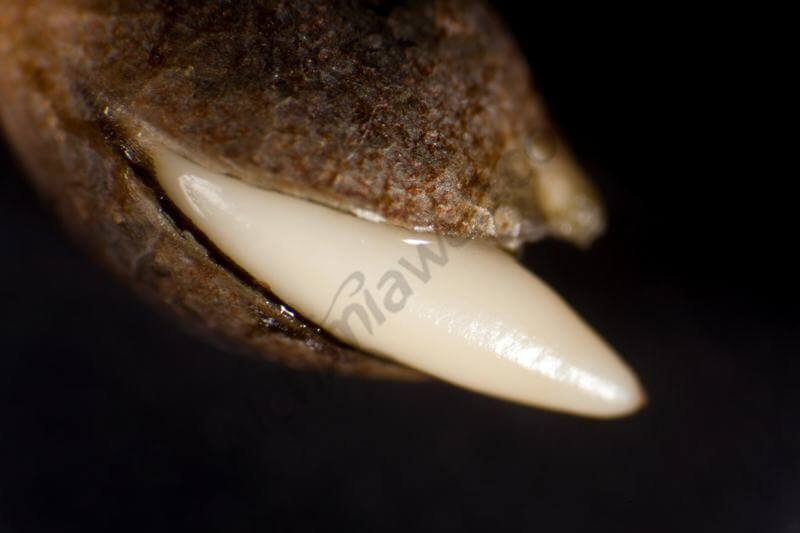
We begin with germination. Pay close attention to germination temperatures and make sure they stay between 20 and 24°C to achieve the highest possible germination rate — otherwise, some seeds may simply fail to sprout.
Once germinated and placed in their first small pot — no larger than 1L — you can move them outside, but first make sure temperatures allow for it. If there’s a minimum of 16°C or above, you can leave them outside during the day. If outdoor temperatures are below 14°C, it’s better to keep them indoors in front of the sunniest window until they become a little more robust.
Another option is to create a small greenhouse using plastic bottles. Cut the bottle along one side near the bottom, make a few holes in it for ventilation, then place the bottle over the plant and push it slightly into the substrate to keep it stable in case of wind.
This allows for much faster growth during the early stages of the plant’s life. It helps maintain high ambient humidity, which encourages faster development and prevents stress caused by lack of moisture. Keep the plant in the same pot throughout the month of March.
Use products that help improve growth in your marijuana plants, such as root stimulators and beneficial microbial life. This way you also start protecting the roots from day one, preventing the appearance of harmful fungi such as pythium or fusarium.
If you’re using a nutrient-rich soil mix, there will be no need to provide liquid feed — at least for the first month and a half. If you’re using a light soil mix instead, you can add liquid fertiliser but in small amounts, on a feed-water-water schedule, always in very limited quantities to avoid keeping the substrate wet for days, as it is always better to water three times a week than just once.
April — the rainy month:
April showers bring May flowers — it’s a very wet month, but temperatures are already somewhat milder, the days are getting longer, and the sun is slowly climbing higher in the sky, hitting the earth more directly and with greater intensity.
During the previous month, March, the plant was busy developing its root system in preparation for vigorous growth. Now it has a strong root system and can be transplanted into a larger pot or directly into the ground. Depending on your needs, you can choose between a 7 or 11L pot, which will be the last container before the plant goes into the ground, or go straight to a pot of at least 50–60L.
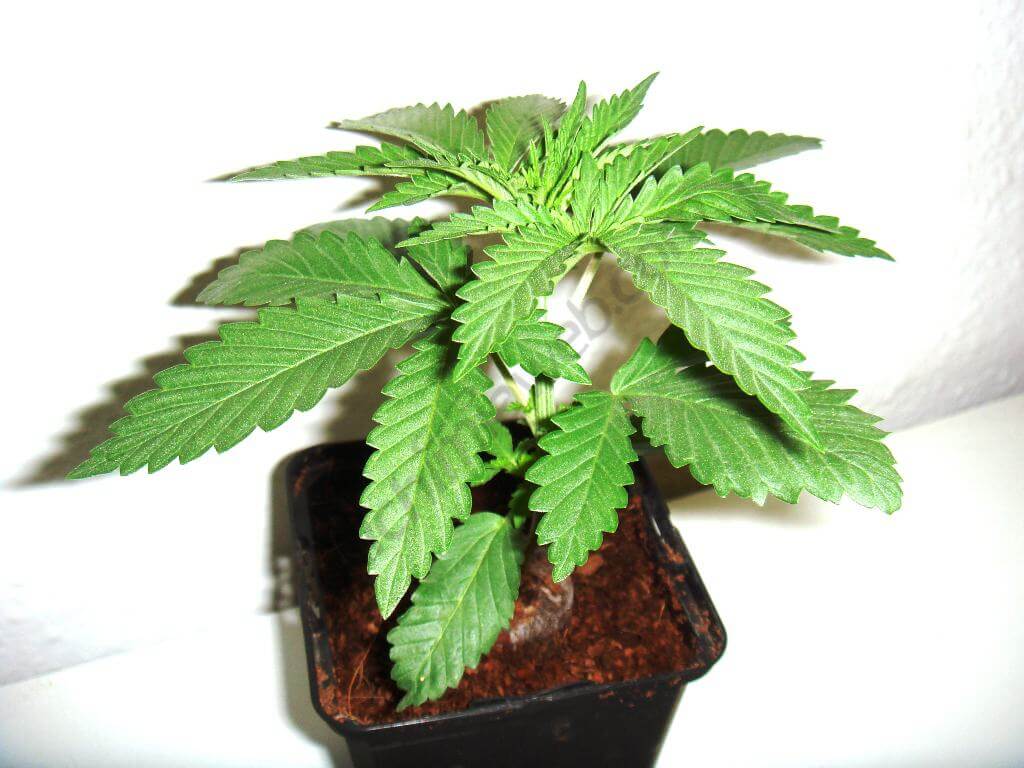
Since it’s still cold in April depending on where you are, it’s ideal to continue using the mini greenhouse. By now the plant has grown a fair bit, though it’s still small — around 15 to 30cm tall (depending on the variety). You can now use the 11L pot and apply the same system, but this time using the mini greenhouse for 11L pots, which serves the same purpose. With this system you can regulate airflow to maintain the optimal humidity level depending on the outdoor weather conditions.
Let the plant spend the month of April in the 11L pot so it can colonise the substrate and significantly increase its root mass — a very important step if you want to achieve truly productive plants.
May — planting in the ground or in a large pot
Over the past two months, the plant has been growing slowly and gradually. This is because growing conditions weren’t the best of the year, with cold temperatures and frequent rainfall. Now, in May, daylight hours are clearly on the rise and outdoor temperatures have eased considerably across the peninsula, except in some northern pockets. It’s time to plant in the ground or move into a large pot.
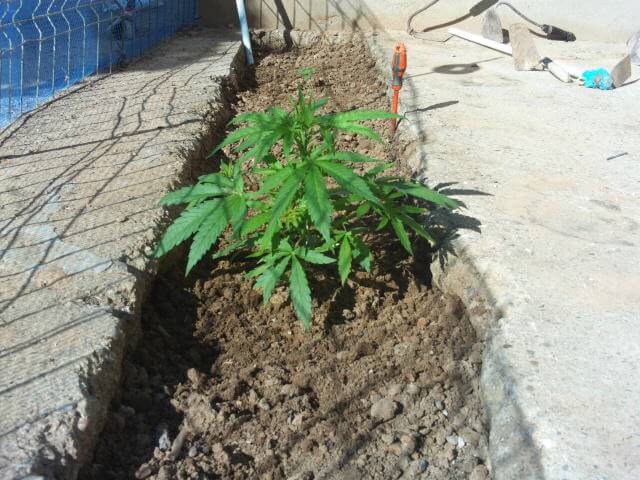
Time to get to work — and as the miners used to say, it’s pickaxe and shovel time. We’ll dig a large, deep hole. The size will depend somewhat on the native substrate in your garden, field or plot. If the existing soil is very unsuitable for growing, the hole will need to be much larger than if you’re starting with a naturally light, airy substrate.
Digging a hole allows you to fill it back up with fresh, quality substrate that you’ve purchased and mixed yourself, as mentioned at the beginning of this post. This ensures your plants have the best possible growing medium to develop, flower, and keep their roots well-protected, compared to growing in hard, compacted native soil.
The hole should be proportional to the size of the plant you want to grow. As a general guideline, the minimum is a hole large enough to hold around 100L or more of substrate.
Once the plant has colonised all the new substrate, it will continue to expand, sending its capillary roots out into the surrounding field or garden soil.
Once the hole has been dug and filled with your custom substrate mix, go ahead and plant. You’ll notice that the plant in the 11L pot (or smaller) is already full of roots, which will give a big boost to subsequent growth. With a healthy root system already in place, the plant will take off quickly once it settles into its new and now permanent growing spot.
If possible, it’s advisable to use trichodermas for cannabis or beneficial microbial life at this transplant stage so everything goes smoothly and the plant extends its roots even faster. Continue using the root stimulator as well. As for nutrients, only add them if you’re using a light soil — if it’s an all-mix (pre-fertilised) soil, it won’t be necessary unless you notice chlorosis developing on the lower leaves of the plant.
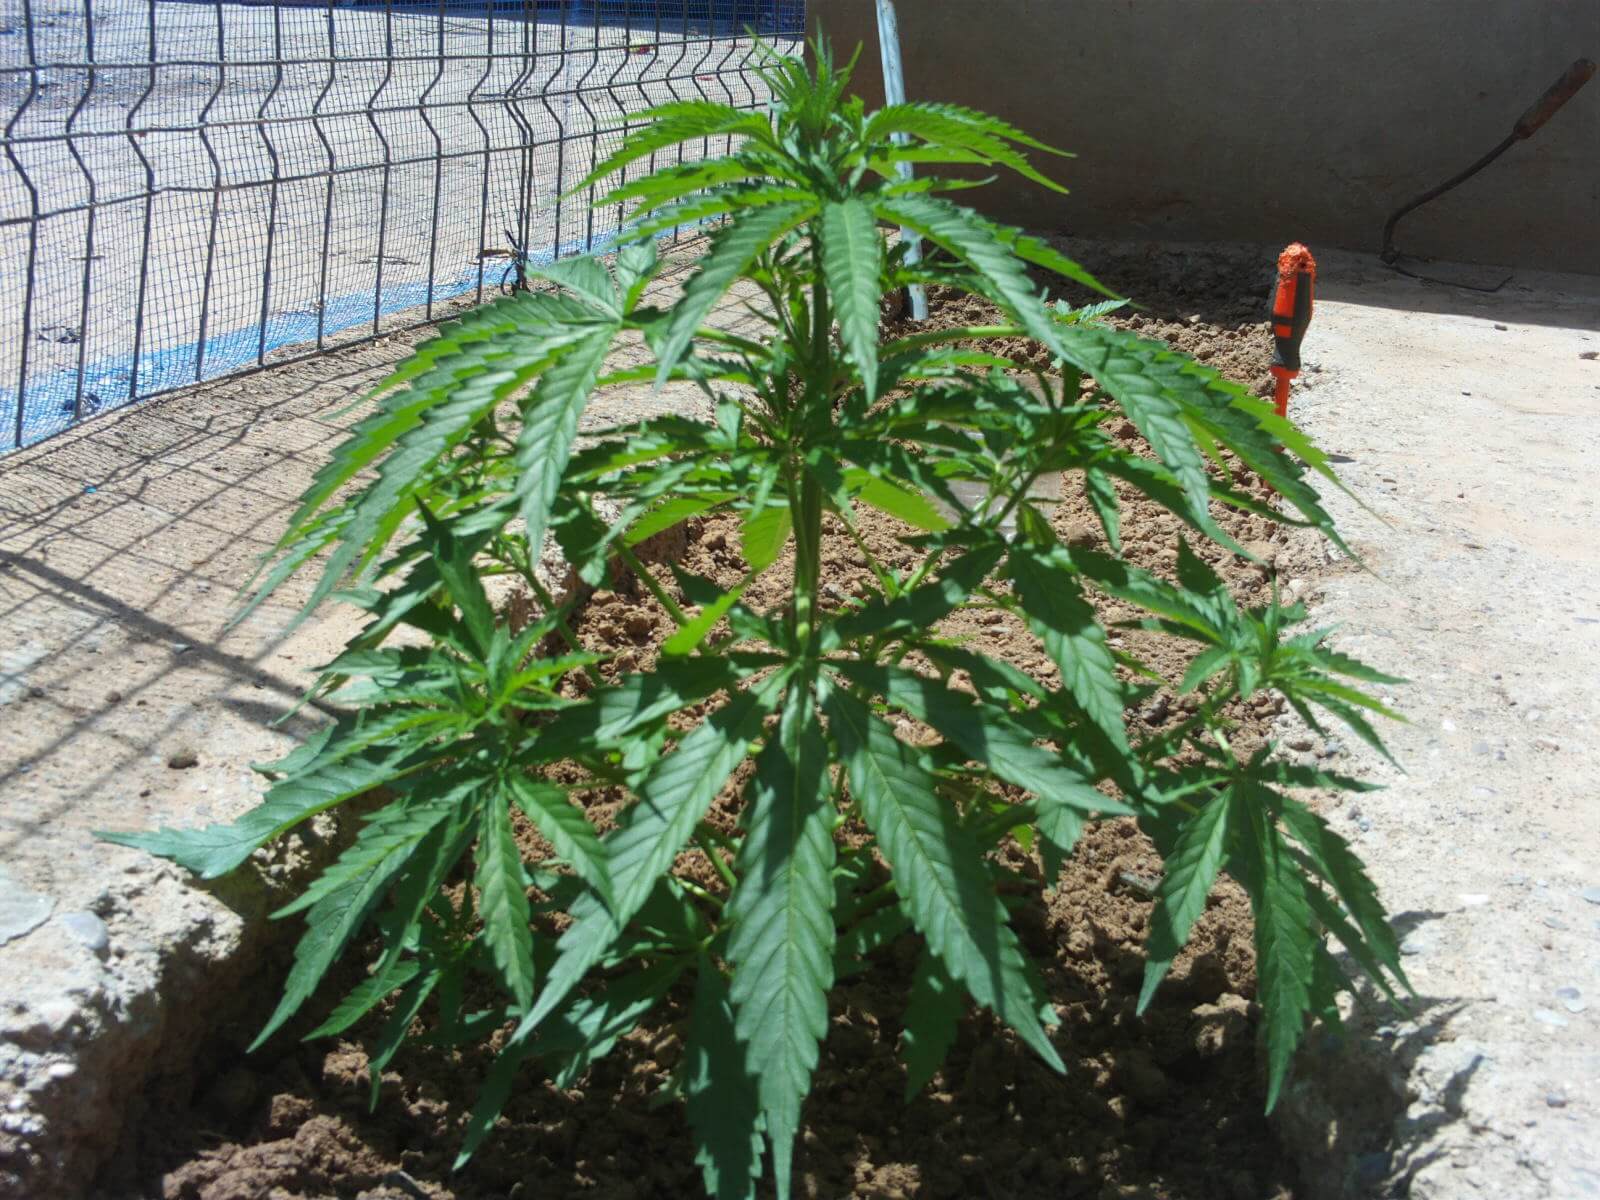
By the end of May, you can expect plants averaging around 50 to 100cm in height (or more, depending on genetics and plant structure), with good lateral branching gradually widening the overall canopy.
June — the month of greatest growth
June is when daylight hours peak, right up until the 21st when the summer solstice occurs, after which light hours gradually begin to decrease. This month, plants will grow dramatically, easily doubling their size compared to the previous month, as soil temperature is ideal for root expansion — the plant will fully colonise all available substrate.
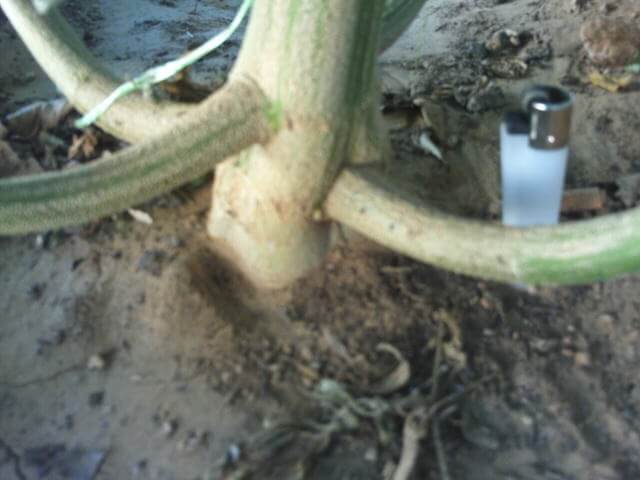
Now is the time to think about pruning. If you don’t have height restrictions, you can comfortably choose not to prune at all. However, if height is an issue or you don’t want plants exceeding 3 or 4 metres, you’ll need to top the central apex, allowing the remaining branches to continue growing from the cut point.
These topping sessions can be repeated continuously well into July, by which time plants will pick up on the changing light hours but will respond slowly and take their time before entering full flower, as buds won’t start to appear until well into August.
By carrying out these prunings, the auxins — the plant’s growth hormones — are redistributed throughout the entire plant, causing the lateral branches to grow almost to the height of the main tops. The result is a huge number of shoots that go on to produce many large, dense buds.
July — photoperiod shift
This is a key month in the cannabis grow, as plants are still growing but are already shifting their metabolism in preparation for the flowering photoperiod. During this month you’ll notice the plant exhibiting very vigorous growth compared to the rest of the vegetative period.
This explosive growth is the outdoor cannabis stretching phase. Indoors, the stretch is easy to identify as it occurs when you switch the light schedule from 18/6 to 12/12h. Outdoors, there’s no timer to manipulate — the plant picks up on the change more gradually, which means the stretch itself also lasts longer. In a 50/50 indica/sativa hybrid, it can comfortably last a month or more.
At this point in the outdoor grow, it becomes easy to see how the plant is throwing out more branches in all directions. Where there used to be open gaps, light can barely pass through the canopy — new leaves and branches have filled everything in as the plant prepares to start forming its first buds.
In terms of nutrition, this month the plants will be calling for a bit more nitrogen, which the plant will use to fuel all the new branches and leaves that will be crucial during flowering for producing large, beautiful buds.
If you don’t provide the nitrogen the plant is asking for, nitrogen deficiency will begin to show in the lower leaves, and this deficiency will carry through the entire flowering period — which is far from ideal if you’re aiming for maximum outdoor yield.
August — flowering begins outdoors:
After the long stretching period lasting more than a month, the first flowers will now start to appear, so it’s also time to switch to flowering nutrients.
It’s possible that at the start of August plants are still growing, and depending on the genetics, flowering may begin earlier or later. The first flowers will generally become visible around the end of the first half of August.
At this stage of the grow, you should start applying flowering nutrients, making sure the plants’ nutritional needs are fully met so they can start building buds with full vigour.
Nutrient levels during this flowering stage will increase gradually until the plant reaches its peak nutrient uptake, which occurs around week 6 of flowering in an 8-week strain.
At this point in the grow, you can prune the parts of the plant closest to the main stem. By removing the small branches growing off the large lateral branches, you’re encouraging the plant to concentrate its energy when it starts budding, so that the flowers cluster at the tips and form larger colas. After this pruning, the stem is also better ventilated, greatly reducing the risk of pythium taking hold and causing stem rot with the subsequent death of the plant.
How do you know what flowering week your plants are in?
It’s a question that seems straightforward but can cause some confusion — let’s clear it up. We know roughly when to harvest the plant based on information provided by the seed bank, but we don’t know exactly when it actually starts flowering.

To get an accurate and reliable answer, you can subtract the number of flowering weeks the plant requires from the expected harvest date. For example: if you have an indica with 8 weeks of flowering that is harvested outdoors in the second week of October, subtract 8 weeks counting back from 15 October. The calculation would go like this:
Harvest falls on 15 October. By then, 2 weeks of October have already passed — subtract those and you get 1 October. Keep subtracting the remaining 6 weeks back from 1 October, and the result tells you that flowering begins around 15 August — more or less what we’d already mentioned, but now you can calculate it precisely.
With this information, it becomes much easier to know how long to continue applying flowering nutrients, and in what quantities, without overdoing it so that the plants finish clean and free of residues at harvest.
September — plants at mid-flowering
We’re now into September and the plants are 2 weeks into flowering — the point at which buds start to really form. From now on, you can feed the plants just as you would in an indoor grow, following the same feeding charts to achieve maximum bud production.
At this point in the grow, start applying flowering nutrients, bloom boosters, and bud enhancers such as PK, preferably in organic form.
Feeding schedule for outdoor plants
In September, you may also start to see the dreaded caterpillars on your plants — most likely once the buds are further along, around week 4 or 5 of flowering. If they appear earlier, that’s actually better news, as they’ll be easier to spot and remove, and it’ll be easier to apply treatments such as Bacillus thuringiensis — also known as Bio Thur or now sold as Trabe Cordalene. This product, along with Spruzit by Neudorff, is one of the few organic products that can be used to eradicate the pest, though a follow-up inspection is still necessary to confirm the infestation has been fully eliminated.

Caterpillar attacks can also trigger secondary problems such as botrytis, which can develop from the caterpillars’ excrement. As the frass ferments, the fungus takes hold, slowly colonising the plant and destroying buds until control measures are taken using fungicides. For this reason, it’s always better to start preventing the fungus as soon as there’s a risk of infection. Products such as propolix can help keep fungal threats at bay, preventing them from taking hold on the leaves and stems of your plants.
In September, it’s also important to keep an eye on potential rainfall. Depending on the region where you’re growing, it may rain more, less, or not at all. If you’re growing in Galicia or similar regions where rainfall is almost constant at this time of year, outdoor growers can try to build a cover structure over the plants using greenhouse plastic sheeting, which prevents rainwater from settling on the buds, greatly reducing the risk of fungal issues while still allowing the plant to breathe. A simple but effective structure can be put together on a very low budget, and it will deliver excellent results.
Plant nutrient demand is now at its peak and this is when you should be feeding your plants the maximum amount of nutrients — especially PK. Since this is a fully organic grow, we recommend using B.A.C. PK so that the buds develop the best possible flavour and you can enjoy the plant’s full terpene profile.
October — harvest time is approaching
October is harvest month. During this period, the goal is to let the plant finish maturing its buds and trichomes, while also helping it flush out any excess nutrients that may remain in its system. Going through this process ensures you harvest the best possible quality herb.
At this stage of the outdoor grow, with two weeks left until harvest, stop applying flowering nutrients and allow the plants to turn completely yellow — this is your assurance that they’re fully flushed of nutrients.
Rainfall during this period can be heavy depending on where you’re growing. It doesn’t hurt to cover the plants during rain using plastic sheeting to prevent water from settling on the buds. If that’s not possible and harvest is just around the corner, but the day you had earmarked in your calendar is set to rain, it’s better to harvest a few days early — this way you’ll avoid any fungal issues.
During these final weeks of flowering, you can perform a root flush to help the plant evacuate the nutrients retained in the substrate, leaving it clean and free of fertiliser residue. This in turn makes it easier for the plant to expel its residual nutrients — stored in its leaves — back into the substrate through its roots, driven by the EC imbalance between the plant and the growing medium.
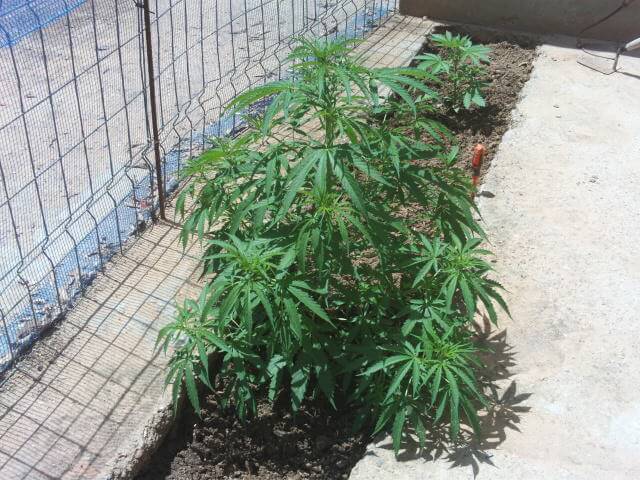
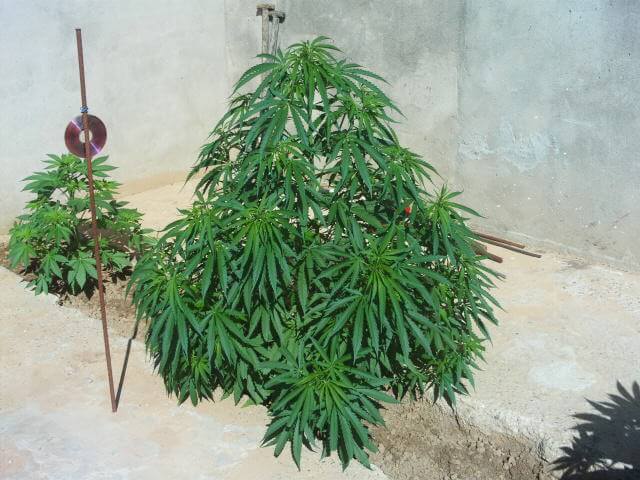
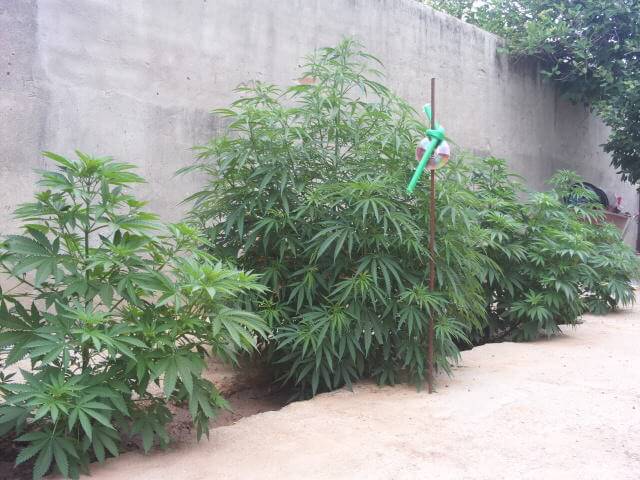
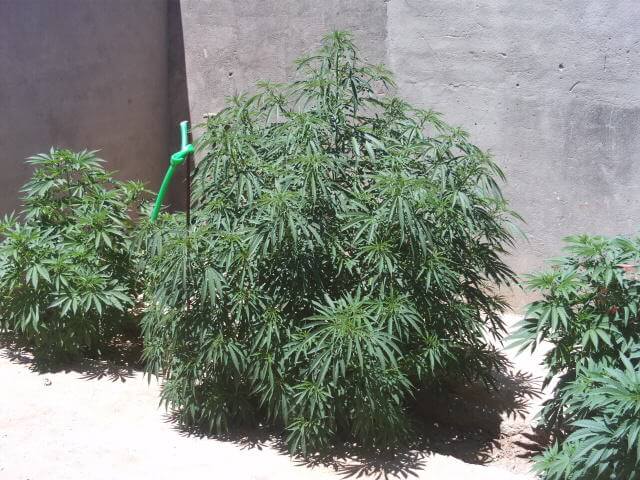
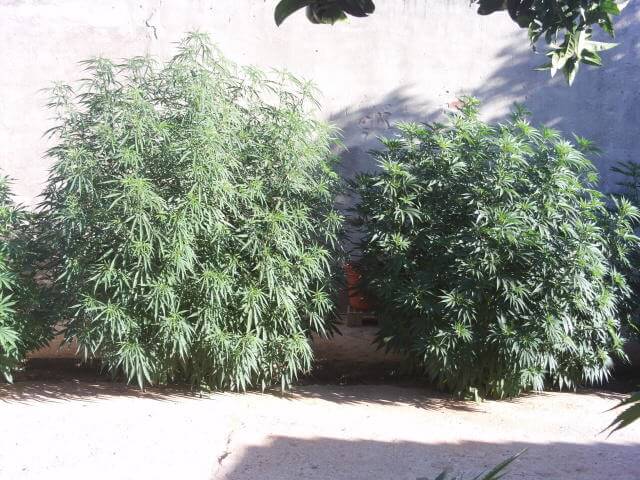
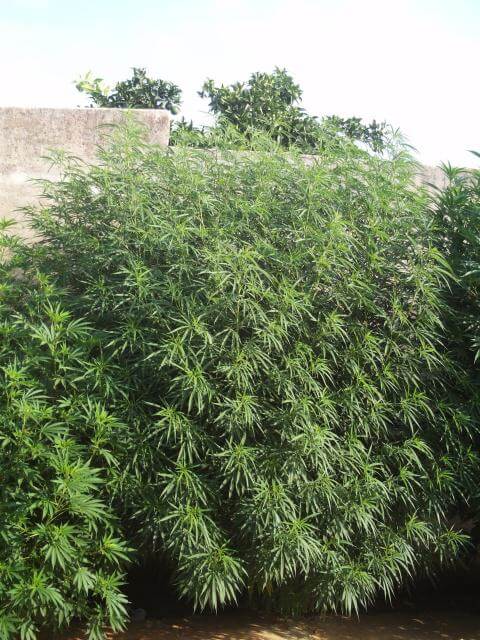
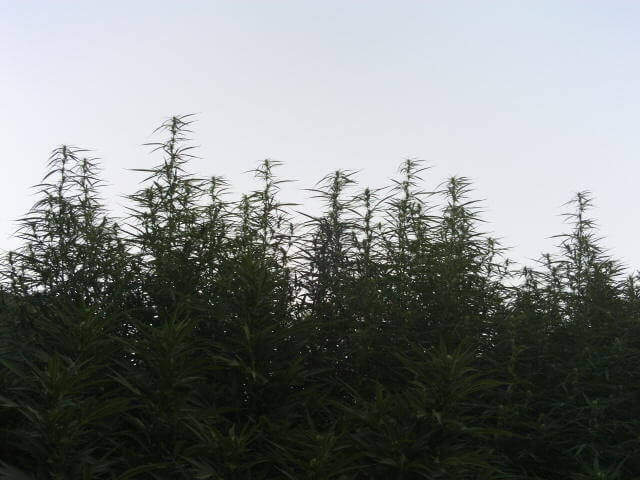
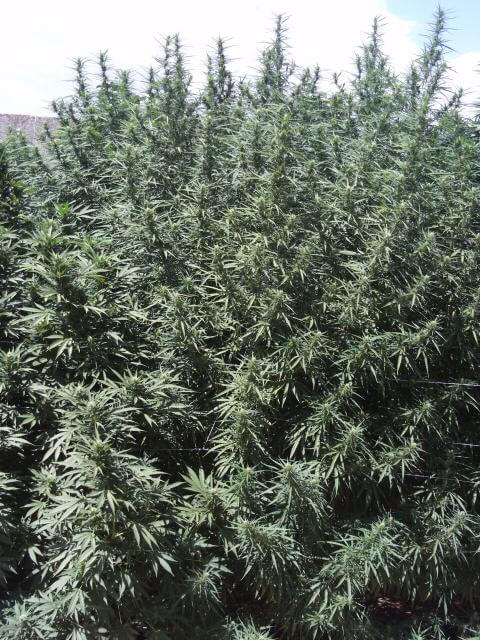
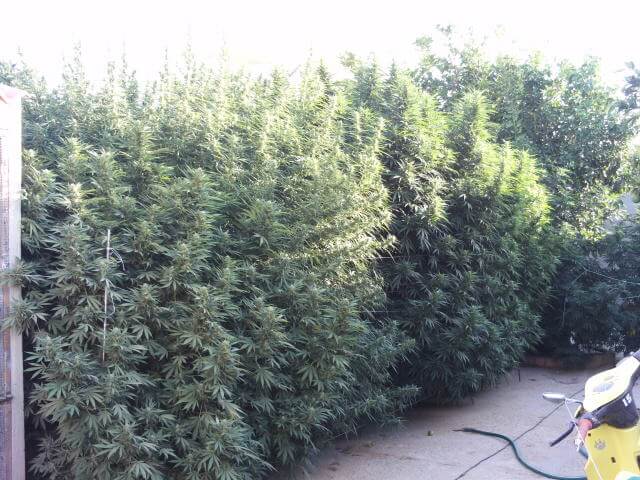
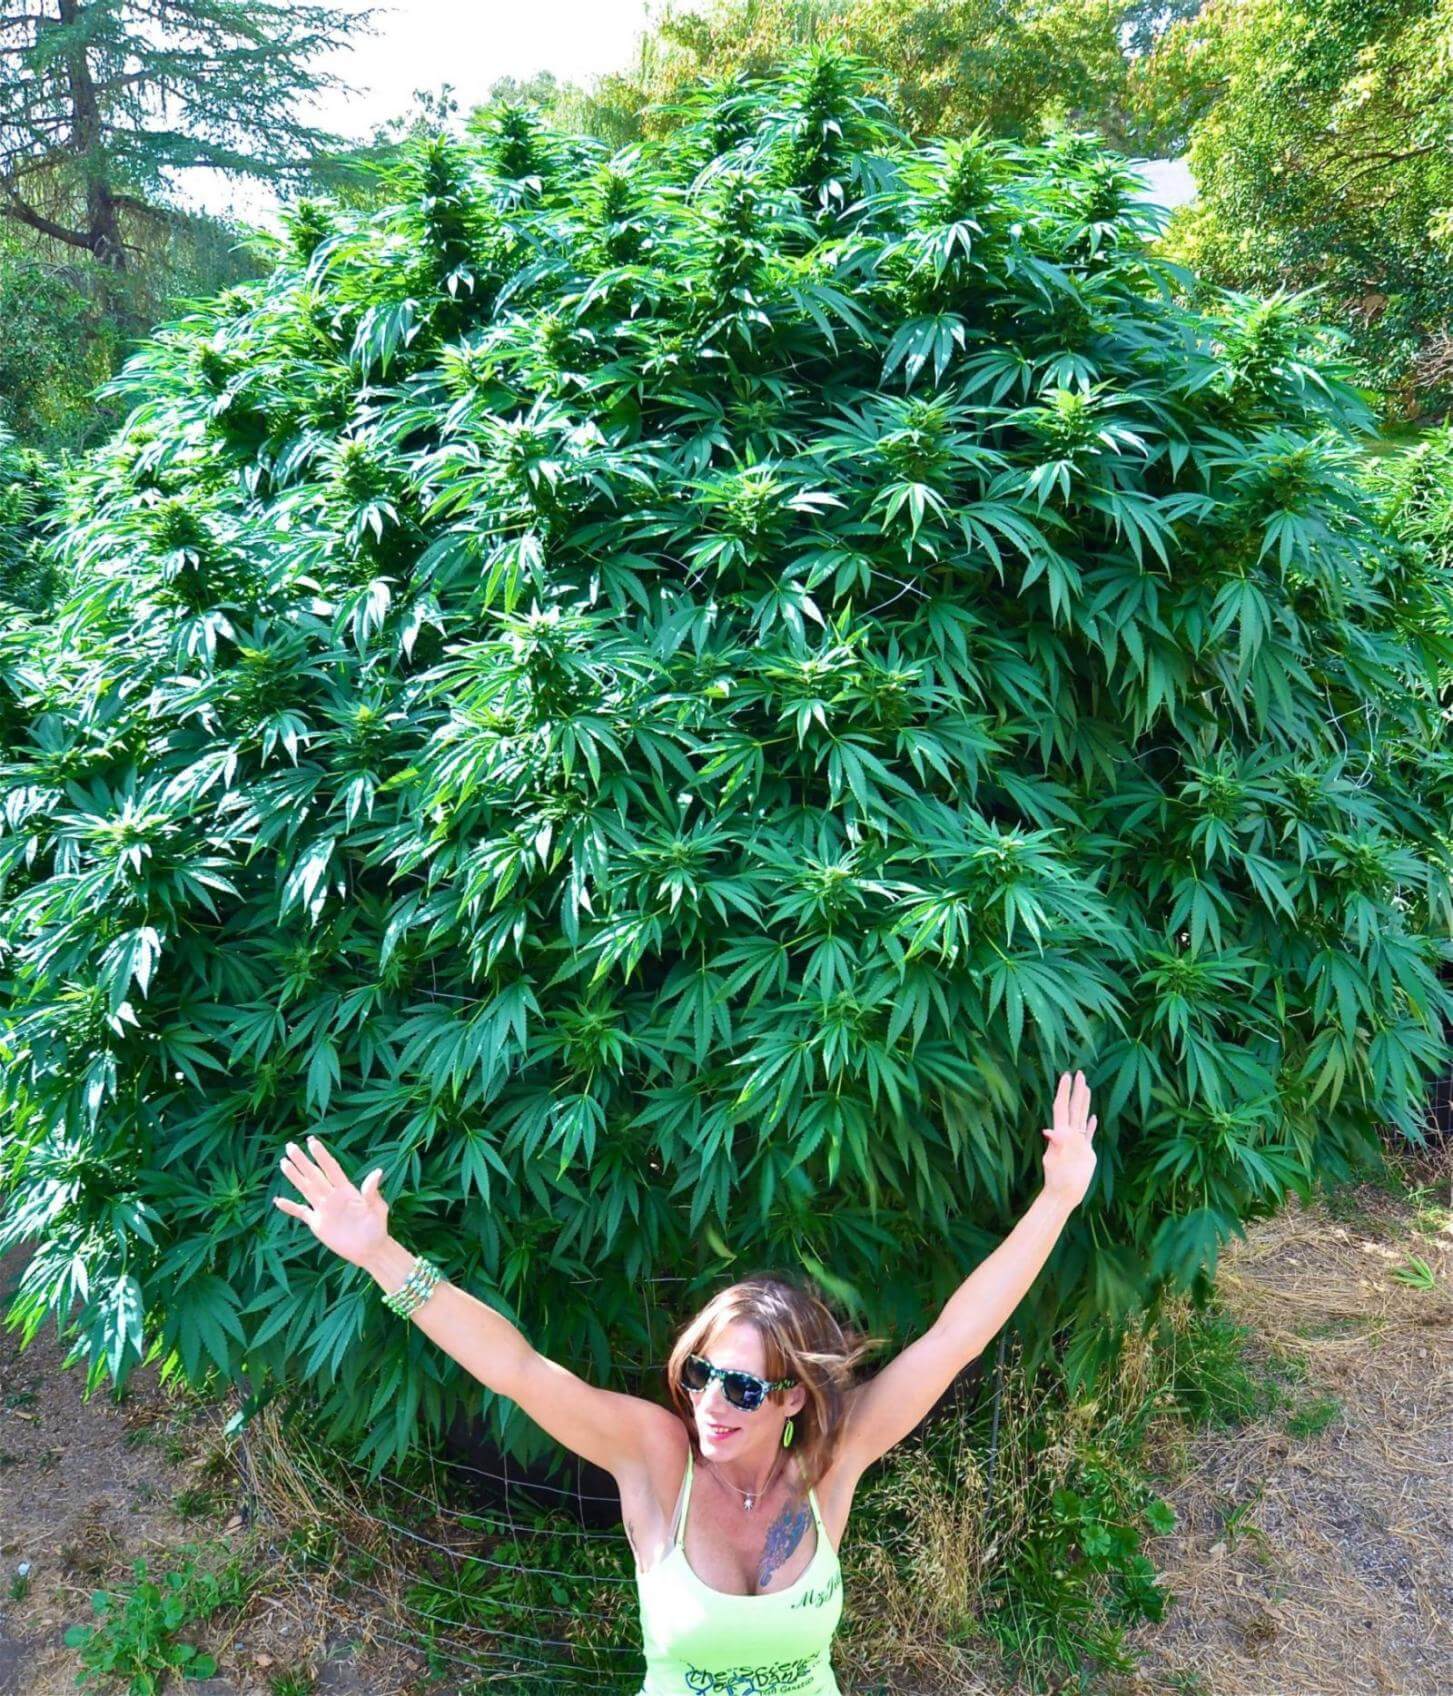
Before we wrap up, we’d like to thank our fellow grower Adokush from the Cannabiscafe forum for kindly providing us with the outdoor grow photos — without doubt a great grower and an even better friend!
We hope this guide proves useful for your outdoor grows!